Building Typesafe Full Stack App w/ Apollo Server 4, Railway, Prisma, Pothos, Next, & TS (part 1 - setting up the server)
The best way to get typesafety in Graphql

If you've got any questions feel free to DM on Twitter @reillyjodonnell
Introduction
I've spent the past few days or so setting this up and wanted to share everything I've learned to hopefully help some people out!
This article assumes basic proficiency with Graphql. We're going to be talking about resolvers, schemas, mutations, and queries. If those things sound confusing to you check out Prisma's fresher on GraphQL.
Let's get started!
Setting up Next
npx create-next-app@latest --typescript
It will then prompt you for the project name and if you want eslint enabled then begins downloading the packages!
Setting up Postgres (Railway)
It's insane how quickly you can provision a Postgres server on Railway I promise it will blow your mind.
Head over to https://railway.app/new and select "Provision PostgreSQL."
Once the database is provisioned (it'll show the date created in the node box) click on it and go over to the "Connect" tab.
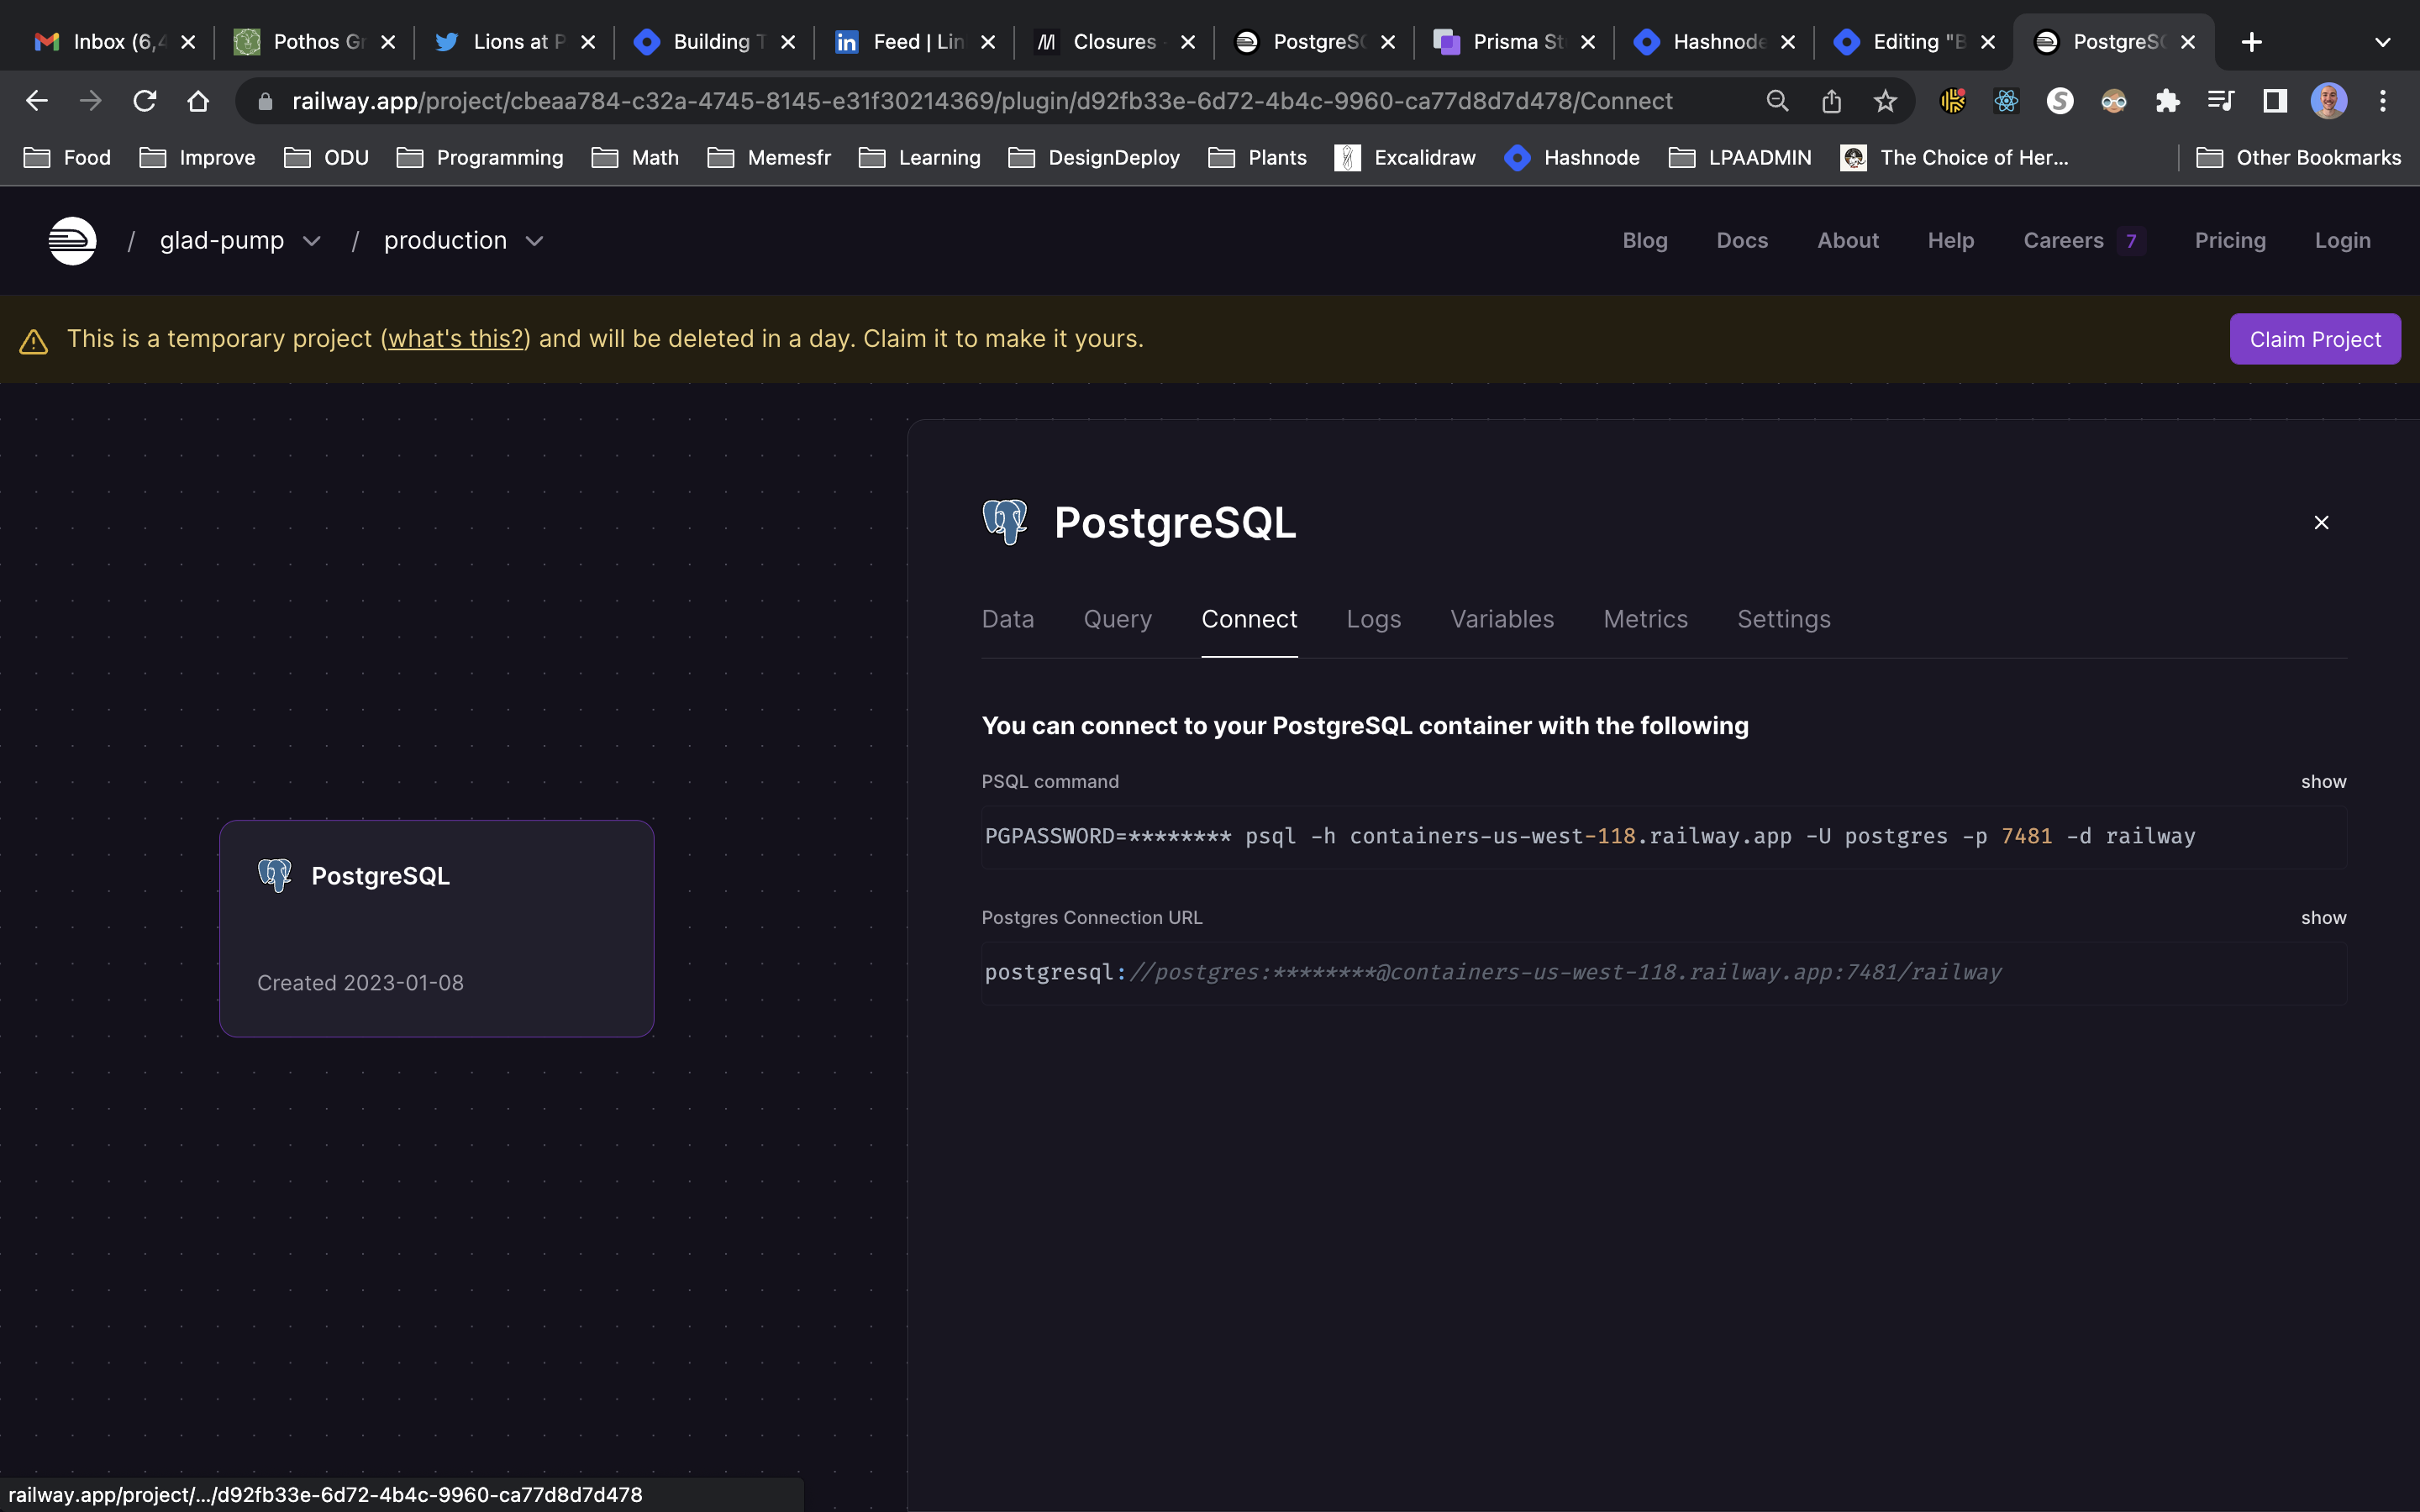
From there copy the Postgres Connection URL and paste it into the .env file for the value for the DATABASE_URL key.
BOOM! 🤯 How easy was that? Now let's set up Prisma.
Setting up Prisma
Prisma is a sweet ORM that gives fantastic type safety by auto-generating types from our database schema! This is perfect for our TS project!
To get started:
yarn add -D prisma @prisma/client
After that completes initialize Prisma
npx prisma init
Add the following to the schema.prisma file
generator client {
  provider = "prisma-client-js"
}

datasource db {
  provider = "postgresql"
  url      = env("DATABASE_URL")
}

model User {
  id               Int       @id @default(autoincrement())
  email            String    @unique
  username         String    @unique
  hashedPassword   String
  name             String
  birthday         DateTime
  createdAt        DateTime  @default(now())
  isOnline         Boolean   @default(false)
  posts            Post[]
}

model Post {
  id          Int       @id @default(autoincrement())
  title       String
  content     String
  createdAt   DateTime  @default(now())
  updatedAt   DateTime  @updatedAt
  url         String
  isPublished Boolean   @default(false)
  author      User      @relation(fields: [authorId], references: [id])
  authorId    Int
}
In summary, we've defined a one-to-many relationship between the User model and Post model. In the Post model we've set a foreign key - "authorId" - paired to a primary key in the User model - "id".
Seeding Database
Now let's seed our database. Create a file seed.ts in the prisma folder
import { PrismaClient } from '@prisma/client'

const db = new PrismaClient()

async function seed() {
  await Promise.all(
    createUsers().map((user) => {
      return db.user.create({ data: user })
    })
  )
}

seed()

function createUsers() {
  return [
    {
      email: 'adam@gmail.com',
      name: 'Adam',
      username: 'adamIsAwesome',
      hashedPassword: '123456',
      birthday: new Date('1945-01-01'),
    },
    {
      email: 'bob@gmail.com',
      name: 'Bob',
      username: 'bob',
      hashedPassword: 'asoidf',
      birthday: new Date('1965-01-01'),
    },
    {
      email: 'charlie@gmail.com',
      name: 'charlie',
      username: 'charlie',
      hashedPassword: 'pjioas',
      birthday: new Date('1985-01-01'),
    },
    {
      email: 'dan@abc.com',
      name: 'Dan',
      username: 'DanTheMan',
      hashedPassword: '1234',
      birthday: new Date('1996-07-01'),
    },
  ]
}
Let's sync our database with our Prisma schema:
yarn prisma db push
Let's seed the database. First, we need a way to compile this seed.ts file. We can run the typescript compiler using tsc and then point Prisma to that compiled file location or we can use ts-node
I like using ts-node so I'll use that
yarn add -D ts-node
Now let's add the command to the package.json
{
  "name": "apollo-prisma-pothos-next",
  "version": "0.1.0",
  "private": true,
  "scripts": {
    "dev": "next dev",
    "build": "next build",
    "start": "next start",
    "lint": "next lint"
  },
  "prisma": {
    "seed": "ts-node --compiler-options {\"module\":\"CommonJS\"} prisma/seed.ts"
  },
  "dependencies": {
    "@next/font": "13.1.1",
    "@prisma/client": "^4.8.1",
    "@types/node": "18.11.18",
    "@types/react": "18.0.26",
    "@types/react-dom": "18.0.10",
    "eslint": "8.31.0",
    "eslint-config-next": "13.1.1",
    "next": "13.1.1",
    "react": "18.2.0",
    "react-dom": "18.2.0",
    "typescript": "4.9.4"
  },
  "devDependencies": {
    "prisma": "^4.8.1"
  }
}
Now we can seed the database
yarn prisma db seed
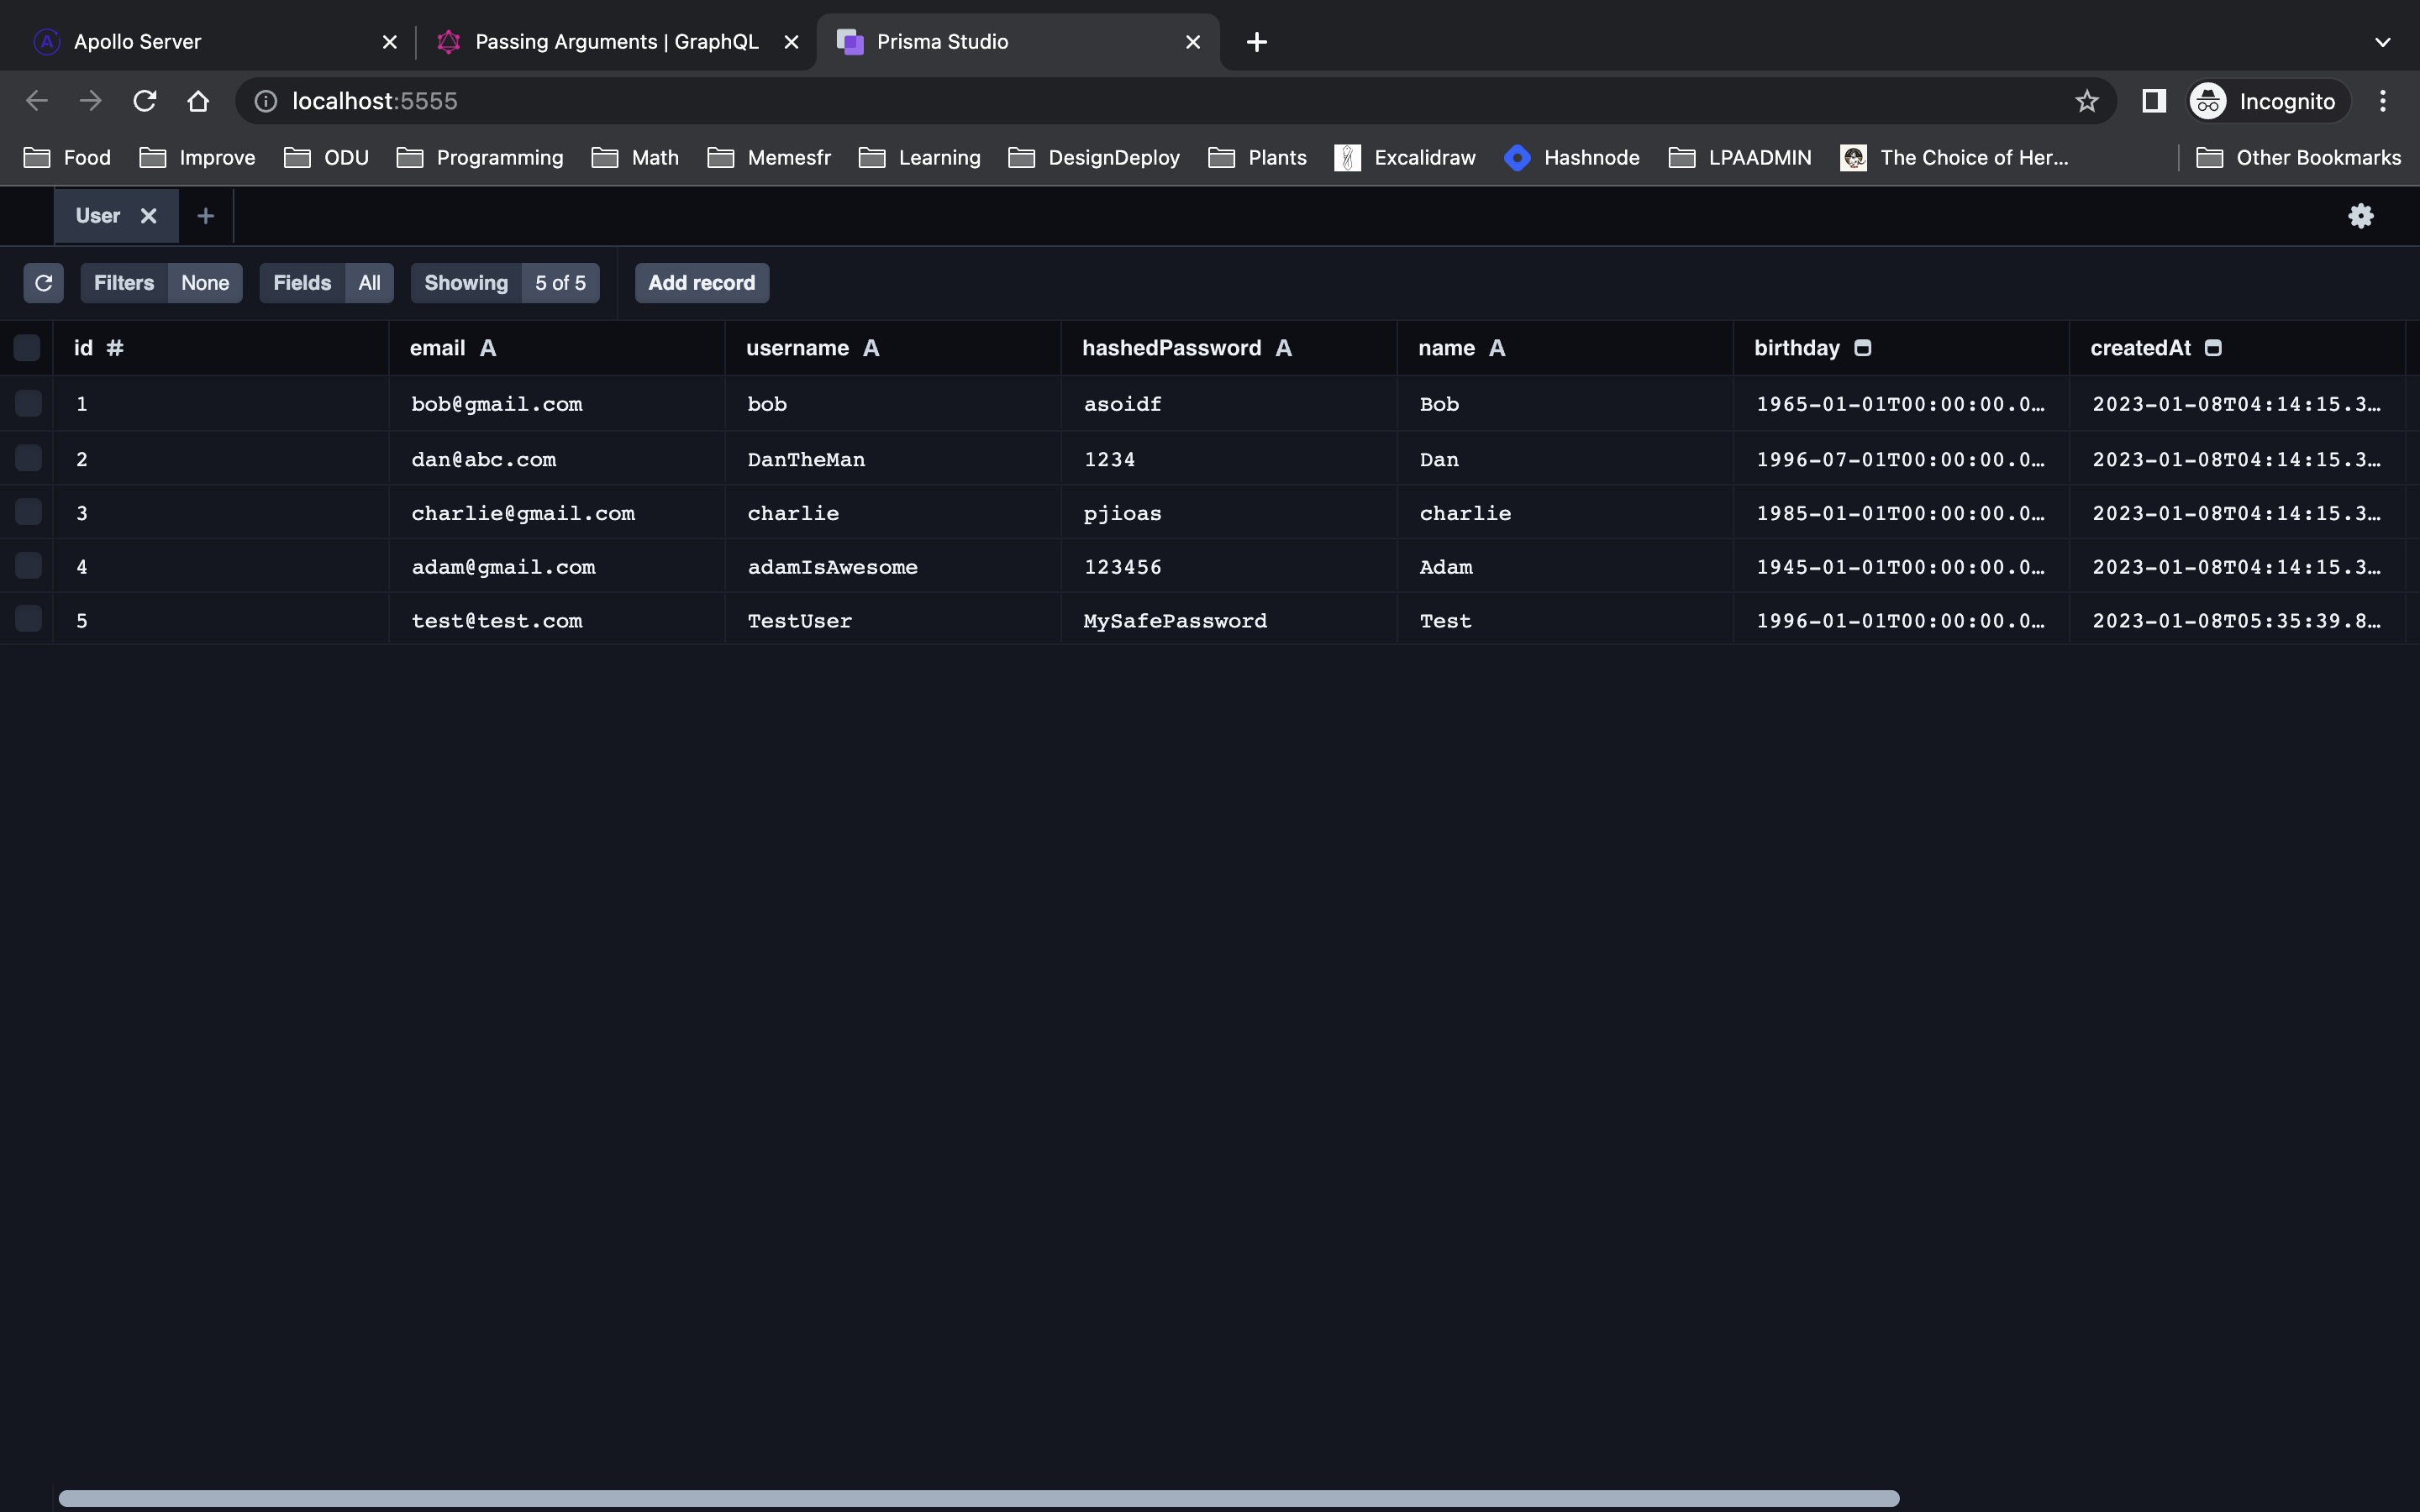
Now we can check out our data!
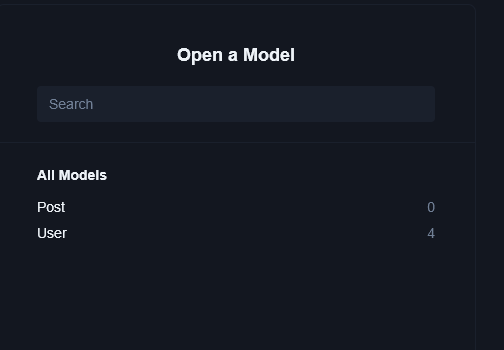
yarn prisma studio
Go to the URL specified and you should see this
Export the Prisma Client
We will want to share the Prisma instance with the other parts of the app, so let's make that accessible!
Create a file called index.ts in the prisma folder with the following contents:
import { PrismaClient } from '@prisma/client'

let db: PrismaClient

declare global {
  var __db: PrismaClient | undefined
}

// this is needed to stop creating a new instance of Prisma everytime the server restarts
if (process.env.NODE_ENV === 'production') {
  db = new PrismaClient()
} else {
  if (!global.__db) {
    global.__db = new PrismaClient()
  }
  db = global.__db
}

export { db }
Awesome! Now we can access the client from other places in our app.
Setting up Apollo Server
Let's add the stuff required for the Apollo Server
yarn add @apollo/server graphql @as-integrations/next
We're using "@as-integrations/next" to have Apollo Server work seamlessly with Next.
The API folder is where all of the server code runs. We're going to set up the GraphQL server to run at the api/graphql endpoint so make a file called graphql.ts in the API folder. In that file, we are going to init the Apollo Server with the schema from Pothos. Then we'll hook up the Next / Apollo Server integration package.
We'll define a schema later so don't worry about that for now. It will look something like this:
graphql.ts
import { ApolloServer } from '@apollo/server';
import { startServerAndCreateNextHandler } from '@as-integrations/next';

const server = new ApolloServer({});

export default startServerAndCreateNextHandler(server);
Now we need to pass a resolver and schema to the ApolloServer instance.
We could use SDL to create the schema and manually create resolvers but we lose the typesafety that a tool like Pothos offers.
So for now let's leave the graphql.ts as is - we'll return after we setup Pothos
Setting up Pothos
Real quick: Pothos supports a Prisma plugin that makes things like defining Prisma object types and solving n+1 issues easier and most importantly shares the types Prisma auto generates to our schemas and resolvers.
To start, install the Pothos package, the Prisma plugin, and graphql-scalars which we will use to create a Date scalar:
yarn add @pothos/core @pothos/plugin-prisma graphql-scalars
Integrate Pothos With Prisma
To get Pothos and Prisma to share types we need to add the following to the top of the schema.prisma file:
generator pothos {
  provider = "prisma-pothos-types"
}
Now every time the Prisma types get re-generated it will create the pothos types.
To regenerate the Prisma types and create the pothos types run:
yarn prisma generate
Setup the Schema Builder
Ok, now we're ready to setup our schema through the SchemaBuilder API!
Let's create a folder called graphql in the root directory. Add a file, builder.ts inside of which we will need to import the SchemaBuilder to build our schema for GraphQL. From there we can hook it up to Prisma and define our custom scalar to support a date scalar.
builder.ts
import SchemaBuilder from '@pothos/core'
import PrismaPlugin from '@pothos/plugin-prisma'
import { DateResolver } from 'graphql-scalars'

// This is the default location for the generator, but this can be
// customized as described above.
// Using a type only import will help avoid issues with undeclared
// exports in esm mode
import type PrismaTypes from '@pothos/plugin-prisma/generated'

import { db as prisma } from '../../prisma/index'

export const builder = new SchemaBuilder<{
// The types used here will be used for the resolvers
  Scalars: {
    Date: { Input: Date; Output: Date }
  }
  PrismaTypes: PrismaTypes
}>({
  plugins: [PrismaPlugin],
  prisma: {
    client: prisma,
  },
})

// in GraphQL the Query type and Mutation type can each only be called once. So we call it here and will add fields to them on the go
builder.queryType();
builder.mutationType();

// This is where we've created the new date scalar
builder.addScalarType('Date', DateResolver, {})
Now let's define some custom types and set up the resolvers.
Defining Our First Custom Object Type - User
Create a folder called schema and in it create a file called user.ts
Now we'll use the SchemaBuilder to generate our custom object. This is where the Prisma plugin will really shine & we'll begin getting some auto-completion.
This user type will be the first of 2 types we will generate using the Pothos builder.
Let's import our builder and use the prismaObject method available that exposes the types Prisma generated. The first argument is the name of this custom type, followed by the fields. The keys in the field can be anything we want but the arguments passed to the exposeString, for example, are literally our Prisma types and has auto-completion.
One quick note: for the birthday field we want to use our custom date scalar and the syntax is just a little different than the rest of them.
So in user.ts we'll have:
import { db } from '../../prisma/index'
import { builder } from '../builder'

builder.prismaObject('User', {
  fields: (t) => ({
    id: t.exposeInt('id'),
    name: t.exposeString('name'),
    email: t.exposeString('email'),
    pass: t.exposeString('hashedPassword'),
    isOnline: t.exposeBoolean('isOnline'),
    username: t.exposeString('username'),
    birthday: t.expose('birthday', {
      type: 'Date',
    }),
  }),
})
Add User Field to Query Type and Provide Resolver
Now that we have our custom type for users defined let's add a field to the root query type for it!
I mentioned earlier that the root query type can only be defined once (which we already did) so we will add fields to it by calling the builder and using the queryFields method. If we wanted to just have one massive root query we could use the builder's queryType method which would create an instance of a root query for us.
Ok, so now we know that we need to use a queryField. We'll need to provide the field a name, we'll call it retrieveUser, and then connect it to the Prisma type and have the resolver return some useful data. Every query can have n number of arguments so we will require an id to be passed as an argument. We'll take that id and search for a user using Prisma.
So continuing user.ts:
// Adding this code to user.ts

// Ok, using the queryField like we mentioned
builder.queryFields((t) => ({
  // Here we name our field for the root query
  retrieveUser: t.prismaField({
    // We are using the 'User' model from Prisma types
    type: 'User',
    // We want the user to pass an argument of the type int
    args: {
      id: t.arg.int({ required: true }),
    },
    // Now we can defined what the resolver returns
    resolve: (query, root, args, ctx, info) => {
      // We find the user with that id using Prisma
      return db.user.findUniqueOrThrow({
        where: {
          id: args.id,
        },
      })
    },
  }),
}))
Add Root Mutation & Resolver for User Type
Now let's define a field to the Mutation type and implement a resolver to create a user. Instead of expecting one single arg (id) we will require all the fields that are required in the Prisma User model.
Same syntax as the queryFields but instead, it will be mutationFields.
Remember that the args are what the user will pass through GraphQL - which we can call whatever we want! Since the fields are required I'm going to add the syntax to make them required.
Add this to user.ts
builder.mutationFields((t) => ({
  createUser: t.prismaField({
    type: 'User',
    args: {
      name: t.arg.string({ required: true }),
      email: t.arg.string({ required: true }),
      pass: t.arg.string({ required: true }),
      username: t.arg.string({ required: true }),
      birthday: t.arg({ type: 'Date', required: true }),
    },
    resolve: (query, root, args, ctx, info) => {
      return db.user.create({
        data: {
          name: args.name,
          email: args.email,
          hashedPassword: args.pass,
          username: args.username,
          birthday: args.birthday,
        },
      });
    },
  }),
}));
Ok, I'm excited to go try these out in the Apollo Server sandbox but first, we will need the builder to generate this into a schema using the toSchema method!
So at the end of user.ts do a named export for that under whatever name you want, I'm just going to call it schema!
export const schema = builder.toSchema()
Import Schema in Apollo Server
Now back in Apollo Server we can import this schema to get this thing running!
graphql.ts
import { ApolloServer } from '@apollo/server';
import { startServerAndCreateNextHandler } from '@as-integrations/next';
import { schema } from '../../graphql/schema/user'

const server = new ApolloServer({});

export default startServerAndCreateNextHandler(server);
Interact with Apollo Server Playground
Now we can start the server by running
yarn dev
Now visit http://localhost:3000/api/graphql to begin the Apollo Server playground - it should look like this!
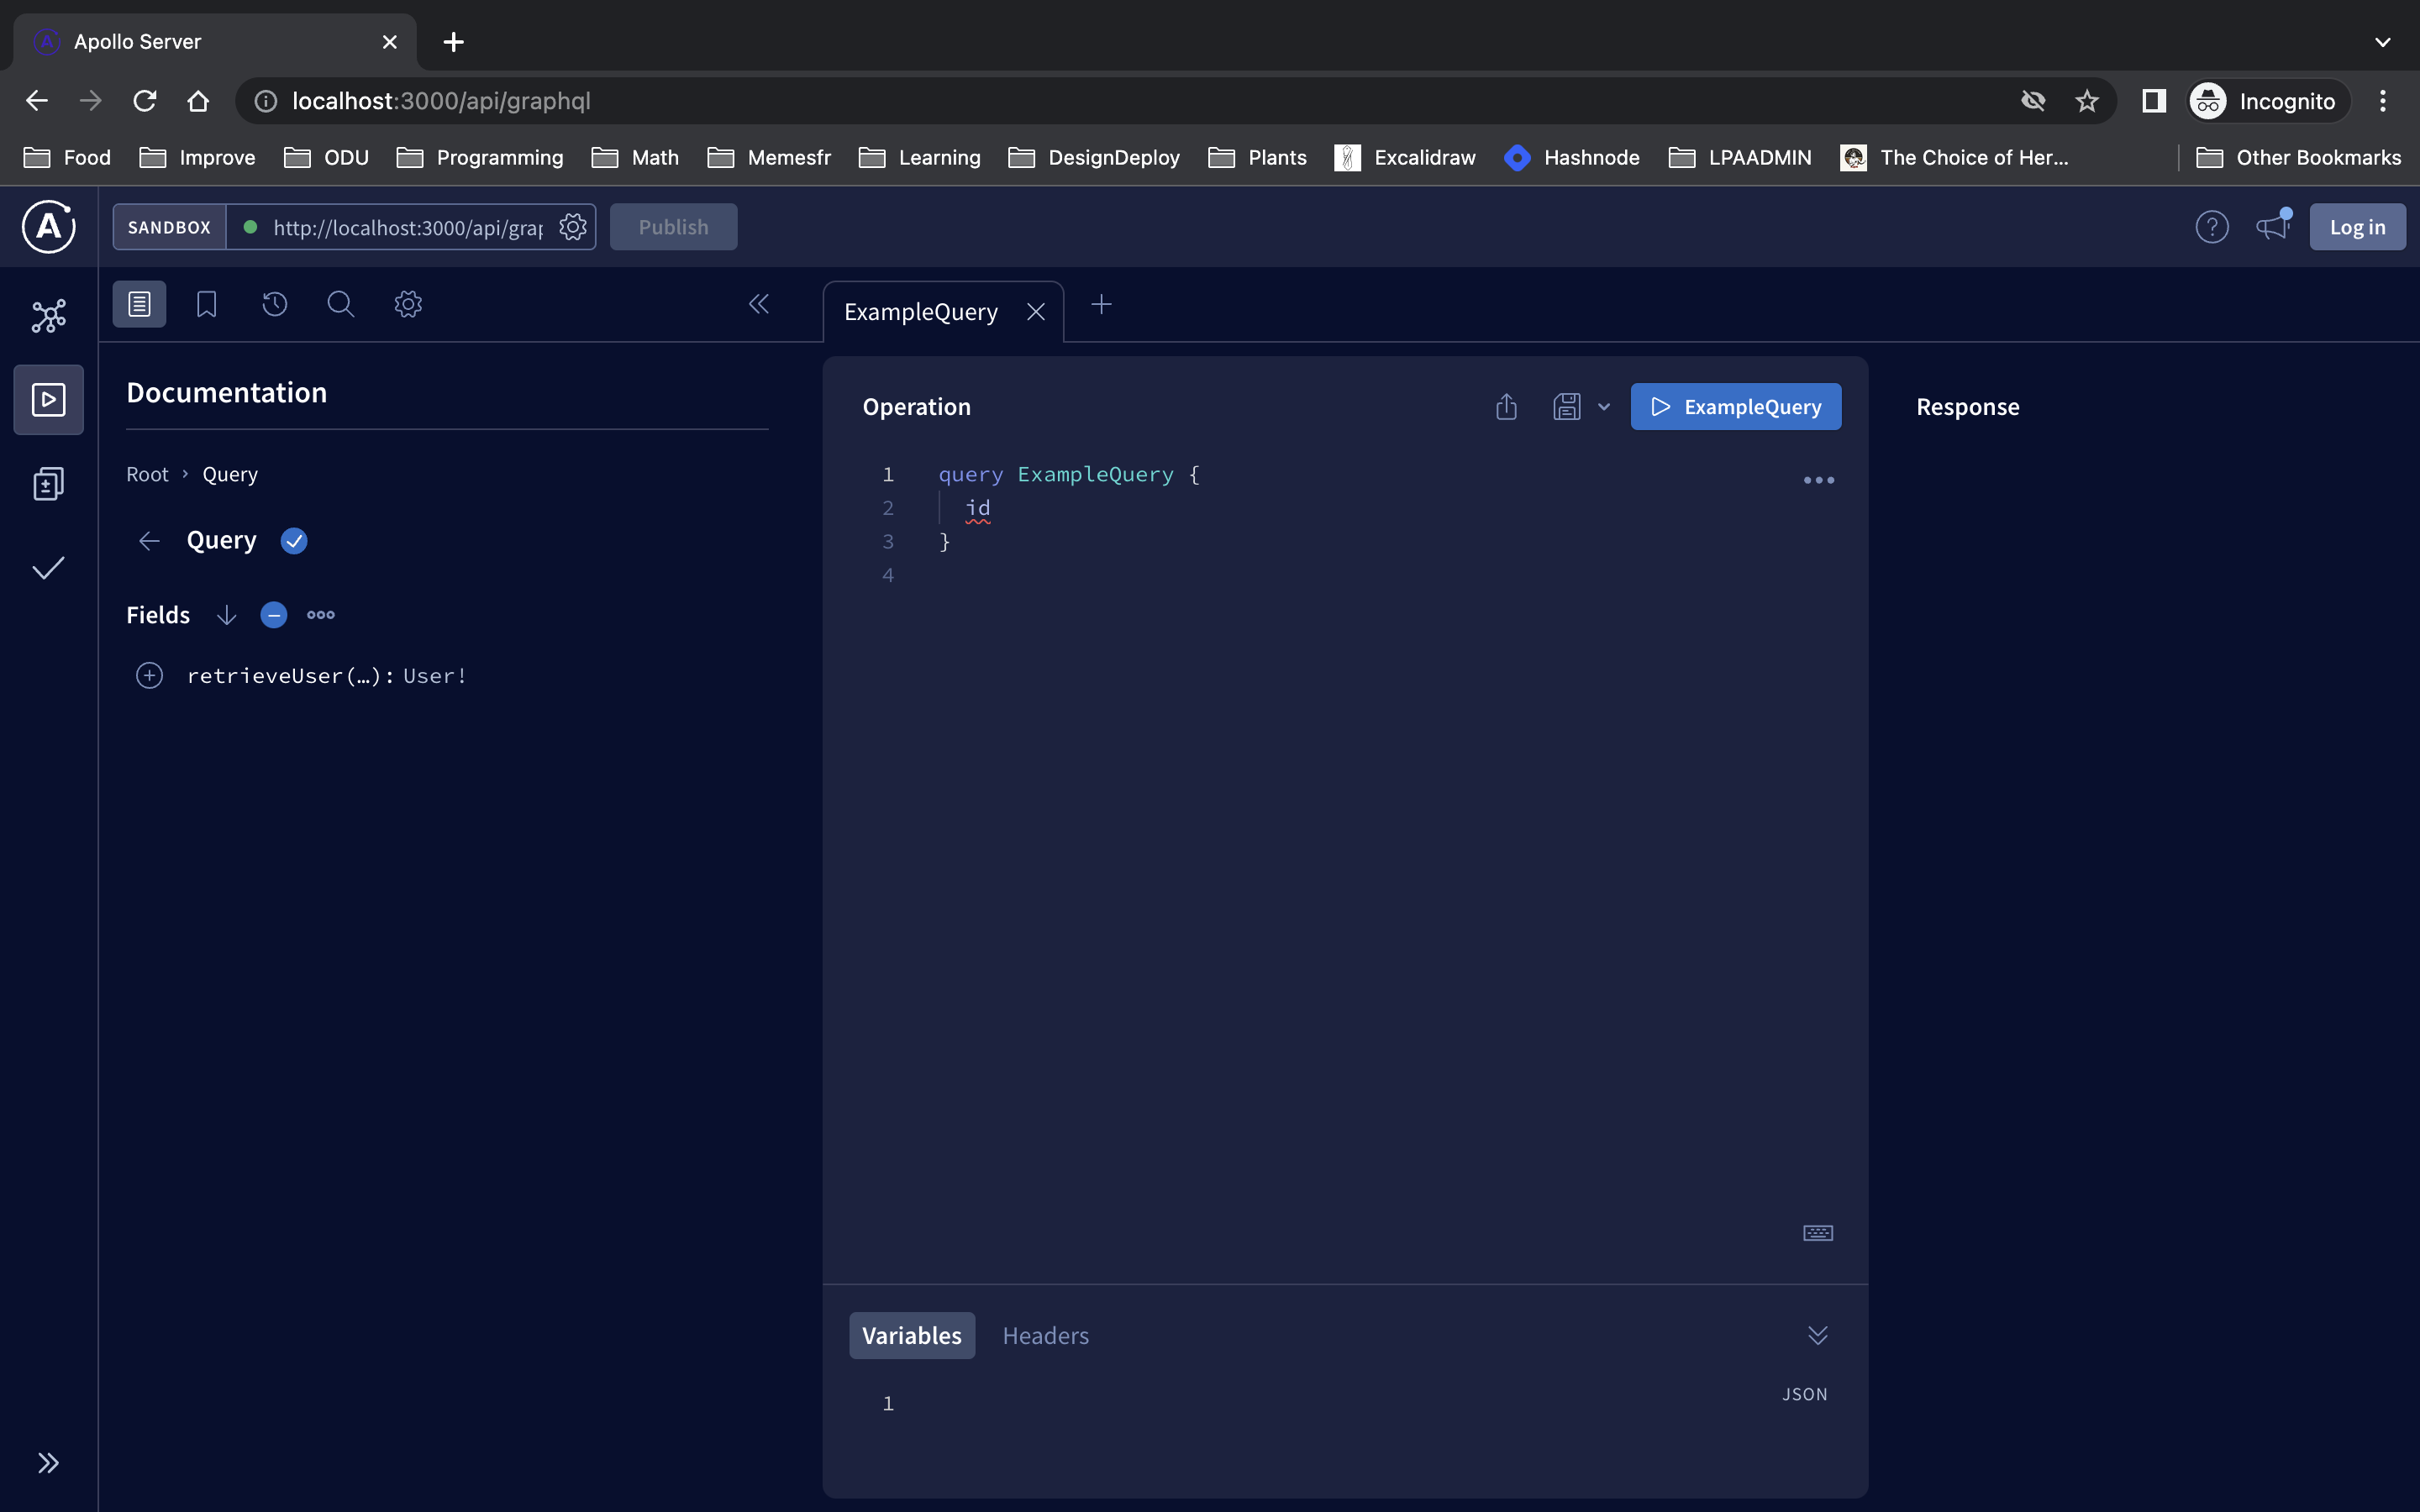
Now if you remove that id with the red squiggly line and type ctrl+space (Windows) / command+space (mac) you'll see the one type we've defined on our Query type. Select that and it will autocomplete the query with the required arguments!
Now inside the braces for the retrieveUser type we can extract all of the fields we defined in our User schema. Hit ctrl+space / command+space to select some fields.
At the bottom of the screen in the variables section set the value of "retrieveUserId" to 1.
Now, depending on what fields you've requested, you should see it's the user "Bob"
Mutations
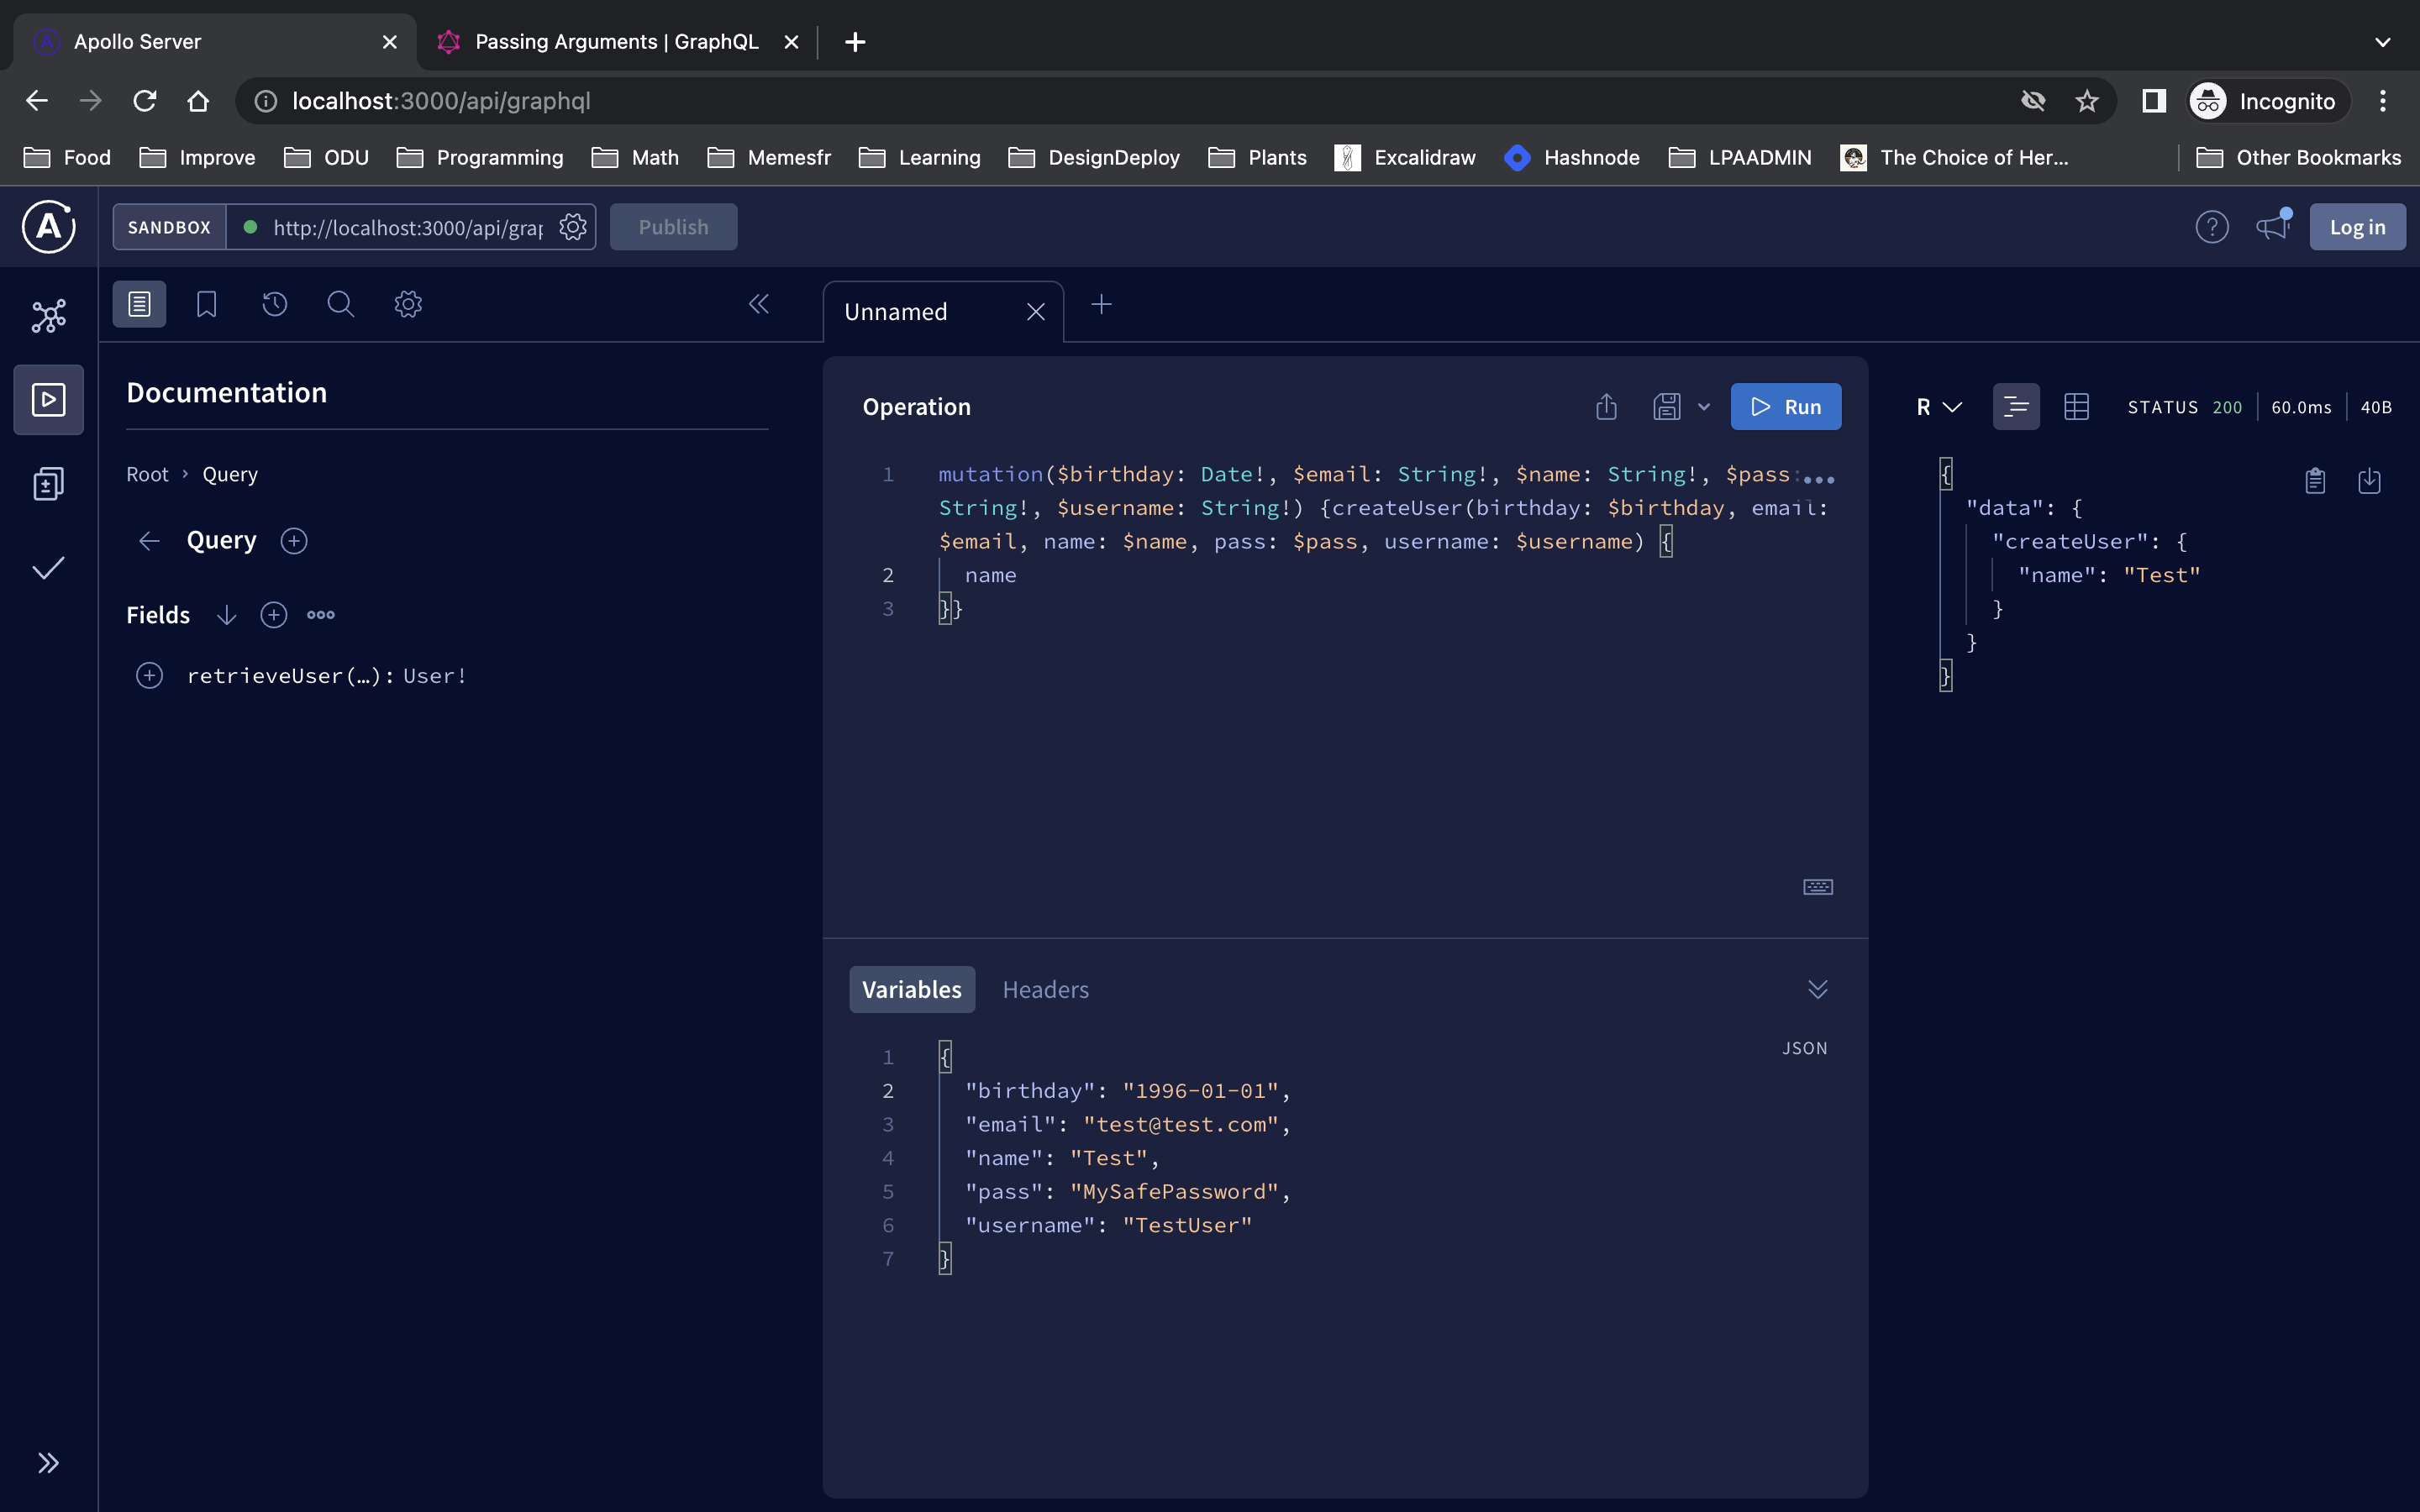
Let's run a mutation now by running createUser field.
Remove all the code and type mutation {} and inside of the curly braces type command+space and select the createUser field. Select whatever fields you want to return.
Be sure your variables match the the names in the arguments. It should look like this:
Now let's check our database and see the new user via Prisma studio!
yarn prisma studio
If everything worked it should be there in the User table!
Defining Our Second Custom Object Type - Post
Now in the schema folder let's add post.ts to create the Post type.
We'll be doing the same thing that we did in user.ts but with different fields to match the Post model.
import { db } from '../../prisma/index';
import { builder } from '../builder';

builder.prismaObject('Post', {
  fields: (t) => ({
    id: t.exposeInt('id'),
    title: t.exposeString('title'),
    content: t.exposeString('content'),
    createdAt: t.expose('createdAt', {
      type: 'Date',
    }),
    updatedAt: t.expose('updatedAt', {
      type: 'Date',
    }),
    url: t.exposeString('url'),
    isPublished: t.exposeBoolean('isPublished'),
    author: t.relation('author'),
  }),
});
Add Post Fields to Query and Mutation Type
Now let's define some fields on the Query and Mutation Type. It will be extremely similar to what we did back in user.ts so I won't walk through the steps this time.
post.ts
// Add this to the post.ts file

builder.queryFields((t) => ({
  post: t.prismaField({
    type: 'Post',
    args: {
      id: t.arg.int({ required: true }),
    },
    resolve: async (query, root, args, ctx, info) => {
      return db.post.findUniqueOrThrow({
        where: {
          id: args.id,
        },
      })
    },
  }),
}))

builder.mutationFields((t) => ({
  createPost: t.prismaField({
    type: 'Post',
    args: {
      title: t.arg.string({ required: true }),
      content: t.arg.string({ required: true }),
      url: t.arg.string({ required: true }),
      isPublished: t.arg.boolean({ required: true }),
      authorId: t.arg.int({ required: true }),
    },
    resolve: async (query, root, args, ctx, info) => {
      return db.post.create({
        data: {
          title: args.title,
          content: args.content,
          url: args.url,
          isPublished: args.isPublished,
          authorId: args.authorId,
        },
      });
    },
  }),
}));
Generating Schema with SchemaBuilder For Multiple Files
Now we've got multiple places that are used for defining our schema: user.ts and post.ts . The SchemaBuilder needs to import all the different components to generate the schema for us.
To do this let's first: remove the call to generate the schema at the bottom of user.ts (don't forget to remove the imported builder too.) The line at the bottom was this:
export const schema = builder.toSchema();
Create an index.ts file inside of the schema folder and import our two files in the schema folder that represent our custom object types, User and Post, and the fields that we added to the Query and Mutation types with their respected resolvers. We'll also need to import the SchemaBuilder to combine it all.
You should have this in index.ts :
import { builder } from '../builder';
import './user';
import './post';

export const schema = builder.toSchema();
Now we'll need to go back to the graphql.ts file to adjust where the schema for ApolloServer lives. Change the path for the import so it looks like this:
import { schema } from '../../graphql/schema/index';
Conclusion
Now we've got our server in a really good place. Feel free to play around in the Apollo Server Playground to create some new posts and view them!
In Part 2 we'll be setting this up to the Next Client and generating the types so we can get typesafety and auto-complete!
If you have any questions / problems def reach out by either commenting or DM'ing me on Twitter @reillyjodonnell
github repo link: https://github.com/reillyjodonnell/apollo-prisma-pothos-next